

AWS Serverless Project - Order Processing System
PRAFUL PATEL ☁️🚀, Highly skilled and motivated Cloud Engineer with a proven track record of designing, implementing, and managing robust cloud infrastructure solutions. With years of hands-on experience, I am deeply passionate about creating scalable and resilient cloud architectures that drive innovation and deliver optimal business outcomes. 🛠 Key Competencies:
Cloud Platforms: AWS, Azure, GCP, OCI Infrastructure as Code: Terraform, Ansible Containers & Orchestration: Docker, Kubernetes Scripting: Python, Bash/Shell CI/CD & Version Control: GitHub, Jenkins, CircleCI Monitoring & Analytics: Grafana, Prometheus, Datadog, New Relic Backup & Recovery: Veeam Operating Systems: Linux, Windows DevOps Tools: AWS Code Build, Code Pipeline, Azure DevOps
📚 Continuous Learning: Staying ahead in the rapidly evolving cloud landscape is my priority. I am committed to expanding my skill set and embracing emerging cloud technologies to drive efficiency and innovation. Passionate Cloud/DevOps enthusiast dedicated to designing, building, and deploying cutting-edge technology solutions. As a devoted YouTuber, I love sharing insights through informative videos and crafting technical blogs that delve into areas like ☁️ Cloud, 🛠️ DevOps, 🐧 Linux, and 📦 Containers. 💻 Open Source Advocate: Contributing to open-source projects is a vital part of my journey. I actively engage in projects centered around Cloud, DevOps, Linux, and Containers, fostering collaboration and innovation within the community. 💌 Let's Connect: I am enthusiastic about virtual collaborations and meeting fellow professionals. Let's explore how I can contribute to your organization's cloud goals. Feel free to connect or DM me.
🌐 Portfolio: Check out my portfolio 🔗 LinkedIn: Connect on LinkedIn 🛠️ GitHub: Explore my projects 🎥 YouTube: Watch my videos 📝 Medium: Read my articles 🌐 Dev.to: Check out my posts

GitHub Repo Link: https://github.com/prafulpatel16/aws-order-proccessing-system.git
AWS Serverless offerings
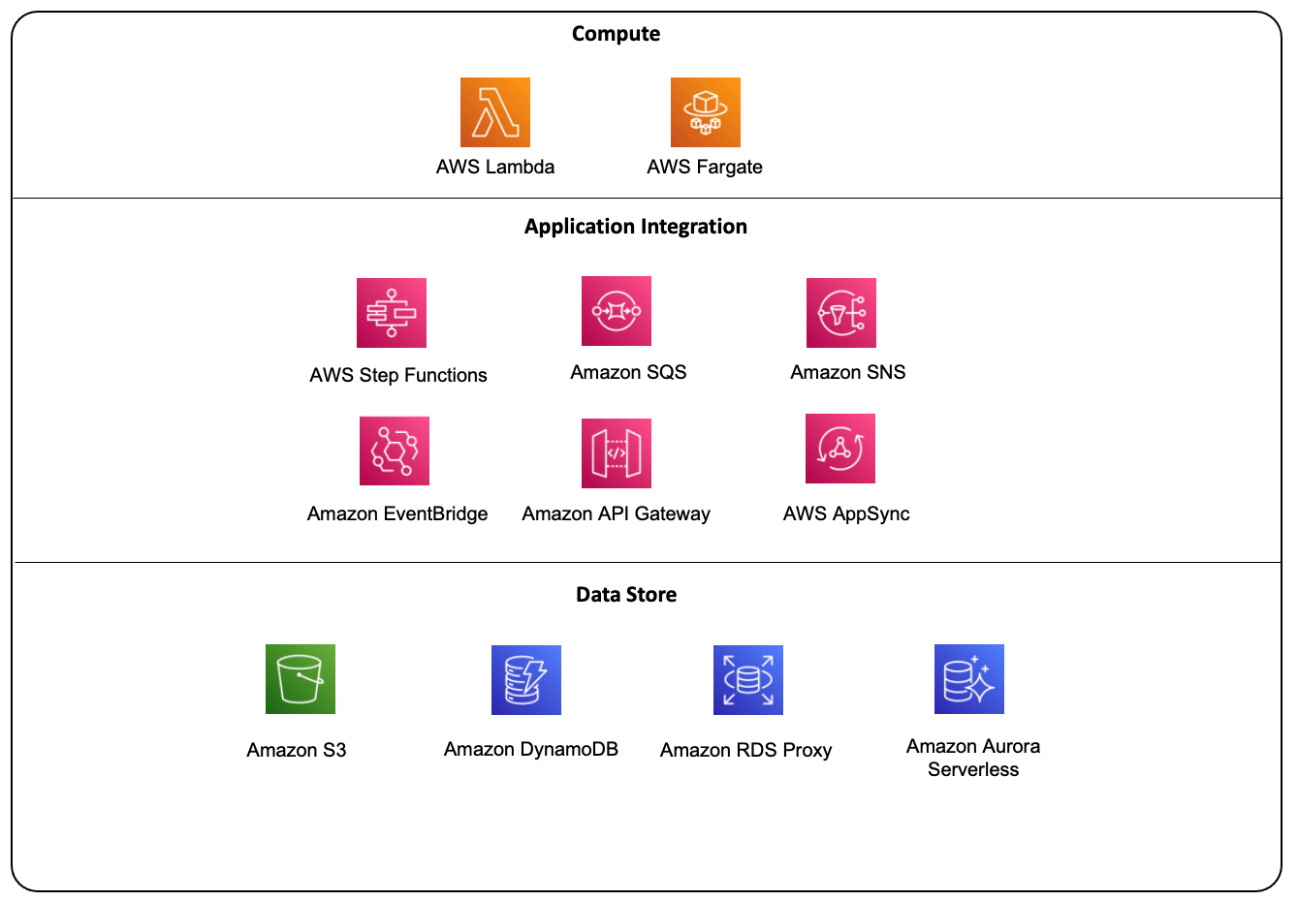
Project Use Case: Real-Time Order Processing System
Architecture Overview:
User Interface (UI): A React frontend hosted on S3 and served via CloudFront.
Backend: API Gateway, AWS Lambda functions, Step Functions for order processing orchestration, and DynamoDB as the database.
Additional Services: SNS for notifications, S3 for storing receipts, and CloudWatch for monitoring.
Frontend (React): A simple order form hosted in an S3 bucket.
API Gateway: To handle order submission requests.
Lambda: Multiple Lambda functions for each stage of the order processing.
Step Functions: Orchestration for the order processing workflow.
DynamoDB: For storing orders and inventory data.
SQS: Queue to process background tasks like sending notifications and generating receipts.
SNS: For real-time notifications to users.
S3: For storing order receipts.
CloudWatch: For monitoring and error logging.
Key Requirements:
Real-time Order Submission: Users can place orders through the e-commerce frontend.
Order Validation: Validate the order, including checking stock availability and payment verification.
Inventory Management: Deduct inventory once the order is placed.
Payment Processing: Integrate with third-party payment gateways.
Notification: Notify users via email when the order is successfully processed.
Store Order Receipts: Store the order details and generate a receipt to be stored in S3.
Monitoring: Use CloudWatch to monitor the flow, errors, and execution times.
Tech Stack:
Frontend: React.js (Hosted in S3 + CloudFront)
API: API Gateway (to expose REST API)
Logic: Lambda functions
Orchestration: Step Functions
Database: DynamoDB (for order details and inventory management)
Notifications: SNS
File Storage: S3 (for storing receipts)
Monitoring: CloudWatch
Step-by-Step Implementation:
1. Frontend (React + API Gateway):
Create a React application for order submission.
Host the React frontend in S3 with CloudFront for faster access.
The frontend sends an API request to the API Gateway to submit the order.
API Gateway triggers a Lambda function to start the process.
2. API Gateway Setup:
Configure AWS API Gateway to expose a REST API with a
/place-orderendpoint.This API will trigger an AWS Lambda function (
OrderPlacementFunction).The Lambda function will initiate an AWS Step Functions workflow.
3. AWS Step Functions:
Define a Step Function to manage the order processing workflow.
The workflow consists of multiple states:
Validate Order: Check for stock availability using Lambda.
Process Payment: Trigger payment processing using a Lambda function.
Update Inventory: Once payment is successful, deduct the inventory.
Send Notification: Send a confirmation email via SNS.
Generate Receipt: Store the order receipt in S3 using Lambda.
4. Order Validation Lambda:
Create a Lambda function (
ValidateOrderFunction) that validates the stock availability by querying DynamoDB.If the item is in stock, the workflow proceeds to payment processing.
5. Payment Processing Lambda:
Lambda function (
ProcessPaymentFunction) integrates with a third-party payment service (e.g., Stripe).After successful payment, update the payment status in DynamoDB.
6. Update Inventory Lambda:
Lambda function (
UpdateInventoryFunction) updates the inventory in DynamoDB once the payment is processed.If inventory update fails, trigger a rollback or handle errors via a defined Step Functions fail state.
7. Send Notification (SNS):
Create an SNS topic to send a notification to the user about the order status.
Lambda function (
SendNotificationFunction) triggers SNS to send an email with the order details to the user.
8. Generate and Store Receipt (S3):
Lambda function (
GenerateReceiptFunction) generates a receipt for the order and stores it in an S3 bucket.A presigned URL is generated for users to download the receipt.
9. Monitoring and Error Handling:
Use AWS CloudWatch to track the workflow and log errors.
Step Functions should have proper error handling with retry logic or defined failure states.
CloudWatch metrics and alarms can be set to monitor for errors in the order process.
AWS Step Functions Workflow Example:
Copy{
  "StartAt": "ValidateOrder",
  "States": {
    "ValidateOrder": {
      "Type": "Task",
      "Resource": "arn:aws:lambda:us-east-1:123456789012:function:ValidateOrderFunction",
      "Next": "ProcessPayment",
      "Catch": [
        {
          "ErrorEquals": ["States.TaskFailed"],
          "Next": "FailOrder"
        }
      ]
    },
    "ProcessPayment": {
      "Type": "Task",
      "Resource": "arn:aws:lambda:us-east-1:123456789012:function:ProcessPaymentFunction",
      "Next": "UpdateInventory"
    },
    "UpdateInventory": {
      "Type": "Task",
      "Resource": "arn:aws:lambda:us-east-1:123456789012:function:UpdateInventoryFunction",
      "Next": "SendNotification"
    },
    "SendNotification": {
      "Type": "Task",
      "Resource": "arn:aws:lambda:us-east-1:123456789012:function:SendNotificationFunction",
      "Next": "GenerateReceipt"
    },
    "GenerateReceipt": {
      "Type": "Task",
      "Resource": "arn:aws:lambda:us-east-1:123456789012:function:GenerateReceiptFunction",
      "End": true
    },
    "FailOrder": {
      "Type": "Fail",
      "Error": "OrderProcessingFailed",
      "Cause": "An error occurred during order processing."
    }
  }
}
Benefits of this Approach:
Scalable and Serverless: No server management needed, the architecture scales automatically with the load.
Event-Driven: AWS Step Functions allow orchestration of Lambda functions in a step-by-step fashion.
Real-Time Notifications: SNS ensures users are notified instantly once the order is processed.
Cost-Effective: You only pay for the compute resources (Lambda executions) and API Gateway usage.
Monitoring: CloudWatch allows monitoring in real time for better insight into performance and errors.Tech Stack:
Frontend: React.js (Hosted in S3 + CloudFront)
API: API Gateway (to expose REST API)
Logic: Lambda functions
Orchestration: Step Functions
Database: DynamoDB (for order details and inventory management)
Notifications: SNS
File Storage: S3 (for storing receipts)
Monitoring: CloudWatch
Project Structure:
Copyorder-processing-system/
├── frontend/                   # React app for frontend
│   ├── public/
│   ├── src/
│   └── package.json
├── backend/
│   ├── functions/              # Lambda functions
│   │   ├── validateOrder.js
│   │   ├── processPayment.js
│   │   ├── updateInventory.js
│   │   ├── sendNotification.js
│   │   ├── generateReceipt.js
│   └── stepFunctions.json      # Step Function definition
├── infrastructure/             # Infrastructure as Code (CloudFormation/Terraform)
│   ├── api-gateway.yaml
│   ├── dynamodb.yaml
│   ├── s3.yaml
│   ├── sqs.yaml
│   ├── sns.yaml
│   └── step-functions.yaml
└── README.md                   # Project documentation
Project Implementation:
Dynamodb Setup
To launch an individual CloudFormation stack using a CloudFormation template (in your case, dynamodb.yaml) that has been uploaded to S3, follow the steps below:
Step 1: Upload the CloudFormation Template to S3
You mentioned you have already uploaded the dynamodb.yaml file to S3. Here's the command you would use if you haven't:
aws s3 cp dynamodb.yaml s3://your-bucket-name/
Replace your-bucket-name with the name of your actual S3 bucket.
Step 2: Launch the CloudFormation Stack Using the Template
You can launch the CloudFormation stack using the AWS CLI by referencing the template in S3.
Here’s how to launch the stack:
- Run the following command to create a CloudFormation stack:
aws cloudformation create-stack \
  --stack-name dynamodb-stack \
  --template-url https://s3.amazonaws.com/your-bucket-name/dynamodb.yaml \
  --capabilities CAPABILITY_NAMED_IAM
Replace your-bucket-name with your S3 bucket name.
Replace
dynamodb.yamlwith the path to the CloudFormation template.The
--capabilities CAPABILITY_NAMED_IAMflag allows CloudFormation to create IAM roles or policies if necessary.
Explanation of Command:
--stack-name dynamodb-stack: The name you want to give the CloudFormation stack. This can be anything meaningful, such asdynamodb-stack.--template-url: The URL of the CloudFormation template stored in your S3 bucket.--capabilities CAPABILITY_NAMED_IAM: This flag is required if your CloudFormation stack creates IAM resources such as roles or policies.
Step 3: Monitor the Stack Creation
Once the command is executed, you can monitor the progress of your stack creation either through the AWS Management Console or using the CLI.
- To check the status of the stack using the CLI, you can run:
aws cloudformation describe-stacks --stack-name dynamodb-stack
This will give you details about the status of the stack (e.g., CREATE_IN_PROGRESS, CREATE_COMPLETE, etc.).
Step 4: Verify Stack Creation
AWS Management Console:
Go to the CloudFormation section in the AWS Management Console.
Find your stack (
dynamodb-stack) in the list of stacks and check its status.You can also look at the Resources tab to see the DynamoDB table and other resources created by your stack.
AWS CLI:
- You can describe the resources created by your stack using this command:
    aws cloudformation describe-stack-resources --stack-name dynamodb-stack
    This will list the resources (e.g., DynamoDB tables) that have been created by the stack.
Step 5: Interact with the Created Resources
Once your stack is successfully created, you can interact with the resources (such as the DynamoDB table) using the AWS Management Console or the AWS CLI.
For example, to list the tables in DynamoDB:
aws dynamodb list-tables
Inventory Table Schema:
Partition Key (Primary Key):
- productId: A unique identifier for each product (String type).
Attributes:
stock: The available stock quantity for the product (Number type).
price: The price of the product (optional, Number type).
description: A description of the product (optional, String type).
Table Definition:
| Attribute Name | Data Type | Purpose |
productId | String | Primary Key, unique identifier for each product. |
stock | Number | Available stock quantity. |
price | Number | Price of the product (optional). |
description | String | Product description (optional). |
Example Table Definition (AWS CLI):
You can create the table using the AWS CLI as follows:
aws dynamodb create-table \
    --table-name Inventory \
    --attribute-definitions AttributeName=productId,AttributeType=S \
    --key-schema AttributeName=productId,KeyType=HASH \
    --provisioned-throughput ReadCapacityUnits=5,WriteCapacityUnits=5
Example Data:
Here is some sample data for the Inventory table:
| productId | stock | price | description |
| P001 | 100 | 19.99 | Red T-shirt |
| P002 | 50 | 29.99 | Blue Jeans |
| P003 | 25 | 9.99 | Black Hat |
| P004 | 10 | 49.99 | Running Shoes |
| P005 | 75 | 5.99 | Cotton Socks |
Adding Sample Data (AWS CLI):
You can add items to your DynamoDB table using the AWS CLI:
aws dynamodb put-item \
    --table-name Inventory \
    --item '{
        "productId": {"S": "P001"},
        "stock": {"N": "100"},
        "price": {"N": "19.99"},
        "description": {"S": "Red T-shirt"}
    }'

aws dynamodb put-item \
    --table-name Inventory \
    --item '{
        "productId": {"S": "P002"},
        "stock": {"N": "50"},
        "price": {"N": "29.99"},
        "description": {"S": "Blue Jeans"}
    }'
Verifying Data:
To verify the data inserted into your DynamoDB table, you can use the following command:
aws dynamodb scan --table-name Inventory
Example Output:
code{
    "Items": [
        {
            "productId": { "S": "P001" },
            "stock": { "N": "100" },
            "price": { "N": "19.99" },
            "description": { "S": "Red T-shirt" }
        },
        {
            "productId": { "S": "P002" },
            "stock": { "N": "50" },
            "price": { "N": "29.99" },
            "description": { "S": "Blue Jeans" }
        }
    ],
    "Count": 2,
    "ScannedCount": 2
}
Conclusion:
Partition Key: Use
productIdas the partition key, which will uniquely identify each product.Attributes: Store the available
stockas a number, and optionally addpriceanddescriptionattributes for each product.

INSERT some items in Inventory data table as stock so it can Validate the order
aws dynamodb put-item \ --table-name Inventory \ --item '{ "productId": {"S": "P001"}, "stock": {"N": "100"}, "price": {"N": "19.99"}, "description": {"S": "Red T-shirt"} }'

Lambda function
Phase 1: Deploy API Gateway to Trigger Lambda
Step 1.1: Create a Lambda Function (OrderPlacementFunction)
Go to the Lambda Console.
Click Create Function.
Function Name:
OrderPlacementFunctionRuntime: Node.js 14.x (or the runtime of your choice)
Role: Choose or create an IAM role that allows Lambda to interact with AWS Step Functions.
In the Lambda code editor, add code that initiates the AWS Step Functions workflow when an order is placed:
orderPlacement.js (Lambda code):
const WS = require('aws-sdk');
const stepFunctions = new AWS.StepFunctions();

exports.handler = async (event) => {
  const order = JSON.parse(event.body);  // Assuming the order details are in the body

  const params = {
    stateMachineArn: process.env.STEP_FUNCTION_ARN,  // ARN of the Step Functions state machine
    input: JSON.stringify(order),  // Pass the order details to Step Functions
  };

  try {
    const result = await stepFunctions.startExecution(params).promise();
    return {
      statusCode: 200,
      body: JSON.stringify({
        message: 'Order processing started',
        executionArn: result.executionArn,
      }),
    };
  } catch (error) {
    console.error(error);
    return {
      statusCode: 500,
      body: JSON.stringify({ message: 'Failed to start order processing' }),
    };
  }
};
Environment Variable:
Add an environment variable to store the Step Functions ARN (
STEP_FUNCTION_ARN).The value will be set later once the Step Functions workflow is created.
Deploy the Lambda Function.

ENV variable
arn:aws:iam::202533534284:role/service-role/StepFunctions-OrderProcessingStateMachine-role-7xpccmy1x

Step Functions - Workflow

{
  "StartAt": "ValidateOrder",
  "States": {
    "ValidateOrder": {
      "Type": "Task",
      "Resource": "arn:aws:lambda:us-east-1:202533534284:function:validateOrderFunction",
      "Next": "SaveOrderToDatabase",
      "ResultPath": "$.validationOutput"
    },
    "SaveOrderToDatabase": {
      "Type": "Task",
      "Resource": "arn:aws:lambda:us-east-1:202533534284:function:saveOrderFunction",
      "Parameters": {
        "OrderId.$": "$.validationOutput.OrderId",
        "customerEmail.$": "$.validationOutput.customerEmail",
        "productId.$": "$.validationOutput.productId",
        "quantity.$": "$.validationOutput.quantity"
      },
      "Next": "ProcessPayment"
    },
    "ProcessPayment": {
      "Type": "Task",
      "Resource": "arn:aws:lambda:us-east-1:202533534284:function:processPaymentFunction",
      "Next": "UpdateInventory"
    },
    "UpdateInventory": {
      "Type": "Task",
      "Resource": "arn:aws:lambda:us-east-1:202533534284:function:updateInventoryFunction",
      "Next": "SendNotification"
    },
    "SendNotification": {
      "Type": "Task",
      "Resource": "arn:aws:lambda:us-east-1:202533534284:function:sendNotificationFunction",
      "Next": "GenerateReceipt"
    },
    "GenerateReceipt": {
      "Type": "Task",
      "Resource": "arn:aws:lambda:us-east-1:202533534284:function:generateReceiptFunction",
      "End": true
    }
  }
}
API Gateway
Step 1.2: Create API Gateway to Trigger Lambda
Go to the API Gateway Console.
Click Create API > REST API.
API Name:
OrderProcessingAPIDescription: API for triggering order placement workflow.
Create a Resource and Method:
Resource:
/place-orderMethod: POST
Integration Type: Lambda Function
Lambda Function: Select
OrderPlacementFunction.
Enable CORS:
- Enable CORS on the
/place-ordermethod to allow cross-origin requests from the frontend.
- Enable CORS on the
Deploy the API:
Go to Actions > Deploy API.
Stage Name:
prod.
Once deployed, you’ll get a public API URL that the frontend can use to place orders.

Create POST Method

Enable CORS

Deploy API - dev stage

Invoke URL
https://88ax43nqed.execute-api.us-east-1.amazonaws.com/dev
Go to Frontend static web app code and place the invoke url


Re deploy the frontend code to the s3 static web application bucket
npm run build
Sync build files to S3:
aws s3 sync ./build s3://your-bucket-name


Go to Static web app URL

Access the React App

S3 - static webapp
1. Frontend Deployment on S3 with CloudFront (React App)
Step 1.1: Build the React Application
Navigate to the frontend directory where your React project is located:
 cd /path-to-your-frontend
 Install dependencies (if you haven’t already):
npm installBuild the project for production:
npm run buildThis will create a
builddirectory with static files optimized for production.
Step 1.2: Create an S3 Bucket for Static Website Hosting
Go to the S3 Console and click on Create Bucket.
Bucket Name: Choose a globally unique name (e.g.,
my-frontend-bucket).Region: Choose a region close to your users.
Block all public access: Uncheck this setting to allow public access (since this is a static website).
Enable Static Website Hosting:
Go to the Properties tab.
Scroll down to Static website hosting.
Choose Enable.
Enter the index document as
index.htmland error document asindex.html(for single-page apps).
Upload the Build Files:
Click on Upload.
Drag and drop the contents of the
buildfolder into the S3 bucket.
Set Object Permissions:
- Select the uploaded objects, go to the Permissions tab, and ensure they have public-read access for static website hosting.
Optional: Set up CloudFront for CDN (for faster access):
Go to the CloudFront Console.
Create a new CloudFront Distribution.
For Origin Domain, select your S3 bucket.
Use HTTPS for security.
Step 1.3: Add Permissions for S3
To make the bucket public:
Go to Bucket Permissions.
Add a Bucket Policy:
 {
   "Version": "2012-10-17",
   "Statement": [
     {
       "Sid": "PublicReadGetObject",
       "Effect": "Allow",
       "Principal": "*",
       "Action": "s3:GetObject",
       "Resource": "arn:aws:s3:::my-frontend-bucket/*"
     }
   ]
 }
Your React frontend is now deployed on S3.
You can access it using the S3 website URL or CloudFront distribution URL.
Challenges & Troubleshooting
Error:
POST https://88ax43nqed.execute-api.us-east-1.amazonaws.com/dev/place-order 502 (Bad Gateway)


Error

Error
App.js:8 POST https://88ax43nqed.execute-api.us-east-1.amazonaws.com/dev/place-order 500 (Internal Server Error)
App.js:16
{message: 'Failed to start order processing', error: "'STATE_MACHINE_ARN'"}
error: "'STATE_MACHINE_ARN'"
message: "Failed to start order processing"
[[Prototype]]: Object

Fix: Updated the ENV variable of STATE_MACHINE_ARN
arn:aws:states:us-east-1:202533534284:stateMachine:OrderProcessingStateMachine

Re test Successful:

Error: The frontend seems to be successful but the products data does not sent to the database
Let’s investigate the error
Verify and ensure that the A-orderPlacement.py Lambda function is correct and it has integrated the Step Machine correctly, defined the ENV for state Machine ARN
Verify that the STEP Machine workflow successfully triggered

Error:

Cloudwatch

Error
2024-10-16T18:48:31.922Z
Error validating order: An error occurred (ValidationException) when calling the GetItem operation: 1 validation error detected: Value ' Inventory' at 'tableName' failed to satisfy constraint: Member must satisfy regular expression pattern: [a-zA-Z0-9_.-]+

Fix:
Check your environment variable for the DynamoDB table name: The error shows that the table name is
' Inventory', which suggests that there is an unintended leading space in the value of theINVENTORY_TABLEenvironment variable.Ensure that the environment variable is set correctly: Go to the AWS Lambda console and verify that the
INVENTORY_TABLEenvironment variable is correctly set without any extra spaces.
How to Correct the Table Name:
Remove the Leading Space:
- In the Lambda function configuration, under Environment Variables, find the
INVENTORY_TABLEvariable and remove any leading or trailing spaces.
- In the Lambda function configuration, under Environment Variables, find the
Verify the Code:
- Ensure that in the code, you're using the correct environment variable without any modifications that might introduce spaces.
Error:

Error validating order: '>=' not supported between instances of 'int' and 'str'
Item queried successful from dynamodb but still getting an error

Fix:
You need to explicitly convert the stock value retrieved from DynamoDB to an integer before comparing it with the quantity.
Here’s the updated code:
import json
import os
import boto3

# Initialize the DynamoDB client
dynamodb = boto3.client('dynamodb')

def lambda_handler(event, context):
    try:
        # Log the entire event to inspect the input
        print(f"Received event: {event}")

        # Get productId and quantity from the event
        product_id = event.get('productId')
        quantity = event.get('quantity')

        if not product_id or not quantity:
            raise Exception("Invalid input: productId and quantity are required")

        # Define the parameters for fetching the product information from DynamoDB
        table_name = os.environ['INVENTORY_TABLE'].strip()  # Strip any extra spaces
        params = {
            'TableName': table_name,
            'Key': {
                'productId': {'S': product_id}
            }
        }

        # Get the item from DynamoDB
        result = dynamodb.get_item(**params)

        # Debugging log for DynamoDB response
        print(f"DynamoDB get_item result: {result}")

        # Check if the item exists
        if 'Item' not in result:
            raise Exception(f"Product with productId {product_id} not found")

        # Check if 'stock' exists in the item and is valid
        if 'stock' not in result['Item']:
            raise Exception(f"Stock information missing for productId {product_id}")

        # Convert stock to integer for comparison
        stock = int(result['Item']['stock']['N'])

        print(f"Stock for productId {product_id}: {stock}, Requested quantity: {quantity}")

        # Ensure that quantity is an integer
        if not isinstance(quantity, int):
            quantity = int(quantity)

        # Check if stock is enough
        if stock >= quantity:
            return {
                'status': 'VALID',
                'productId': product_id,
                'quantity': quantity
            }
        else:
            raise Exception('Out of stock')

    except Exception as e:
        print(f"Error validating order: {e}")
        raise Exception('Order validation failed')
Key Changes:
Convert
stockto an integer:stock = int(result['Item']['stock']['N'])ensures that the stock value retrieved from DynamoDB is converted from a string to an integer.
Ensure
quantityis an integer:- Added a check to ensure that the
quantityis also an integer. If it's a string, it will be converted to an integer usingquantity = int(quantity).
- Added a check to ensure that the
Redeploy the Lambda function and test

Test
Error:
Step: ValidateOrder Passed,
saveOrdertoDatabase Failed


{ "cause": "User: arn:aws:sts::202533534284:assumed-role/StepFunctions-OrderProcessingStateMachine-role-7xpccmy1x/HyBZgMwbOpRHNcXcgWnobLmYTRXnIfkF is not authorized to perform: lambda:InvokeFunction on resource: arn:aws:lambda:us-east-1:202533534284:function:saveOrderFunction because no identity-based policy allows the lambda:InvokeFunction action (Service: Lambda, Status Code: 403, Request ID: ac1acb0b-b064-4e2d-a7d8-c8a6e49709cc)", "error": "Lambda.AWSLambdaException" }
The error you're encountering is a permissions issue, where the Step Functions role does not have permission to invoke the specified Lambda function (saveOrderFunction). The role that Step Functions assumes (StepFunctions-OrderProcessingStateMachine-role-7xpccmy1x) needs the lambda:InvokeFunction permission.
Steps to Fix:
- Update the IAM Role for Step Functions: You need to attach a policy to the IAM role (
StepFunctions-OrderProcessingStateMachine-role-7xpccmy1x) that allows it to invoke the Lambda function (saveOrderFunction).
Option 1: Attach the Policy via the AWS Console
Go to the IAM Console in AWS.
Find the role named
StepFunctions-OrderProcessingStateMachine-role-7xpccmy1x.Click Attach Policies.
Create a new inline policy by clicking Add permissions > Create inline policy.
In the JSON tab, use the following policy to allow
lambda:InvokeFunctionon thesaveOrderFunction:
{
    "Version": "2012-10-17",
    "Statement": [
        {
            "Effect": "Allow",
            "Action": "lambda:InvokeFunction",
            "Resource": "arn:aws:lambda:us-east-1:202533534284:function:saveOrderFunction"
        }
    ]
}
- Review and Save the policy.
Option 2: Attach the Policy Using the AWS CLI
You can also use the AWS CLI to attach the required permission to the IAM role.
- Run the following command to attach the inline policy to the Step Functions role:
aws iam put-role-policy \
    --role-name StepFunctions-OrderProcessingStateMachine-role-7xpccmy1x \
    --policy-name AlowInvokeLambda \
    --policy-document '{
        "Version": "2012-10-17",
        "Statement": [
            {
                "Effect": "Allow",
                "Action": "lambda:InvokeFunction",
                "Resource": "arn:aws:lambda:us-east-1:202533534284:function:saveOrderFunction"
            }
        ]
    }'
Explanation:
The
Action:"lambda:InvokeFunction"allows the role to invoke the Lambda function.The
Resourcespecifies the ARN of the Lambda function (saveOrderFunction) that the role should be allowed to invoke.

Error: Need to pass the output of one step function to input to next step function
The error message "'OrderId' is required but not found in the event or is None" suggests that the OrderId field is either missing or None in the event passed to the saveOrderToDatabase Lambda function. This could mean that the OrderId is not being passed correctly from the previous step in the AWS Step Functions workflow.
Steps to Diagnose and Fix:
Verify the Event in CloudWatch Logs:
- Ensure that the event being passed to the
saveOrderToDatabasefunction contains theOrderIdfield. Add logging to capture the full event, as you are already doing withprint(f"Received event: {event}").
- Ensure that the event being passed to the
Ensure
OrderIdis Passed Between Steps:If the
OrderIdis being generated in a previous step, you need to make sure it is being passed correctly between steps in the Step Functions workflow.In the Step Functions console, check the input and output of each state to ensure that
OrderIdis included in the output of the previous step and passed into this step.
Adjusting Step Functions Configuration:
If OrderId is missing because it is not passed correctly between steps, you need to make sure that the state machine's "InputPath", "ResultPath", or "OutputPath" is correctly set to pass the OrderId from one step to the next.
Example of Passing Data Between Steps:
In your Step Function definition, you can use "Parameters" to ensure the necessary fields like OrderId, customerEmail, productId, and quantity are passed to the saveOrderToDatabase step.
{
  "StartAt": "ValidateOrder",
  "States": {
    "ValidateOrder": {
      "Type": "Task",
      "Resource": "arn:aws:lambda:us-east-1:123456789012:function:validateOrderFunction",
      "Next": "SaveOrderToDatabase",
      "ResultPath": "$.validationOutput"
    },
    "SaveOrderToDatabase": {
      "Type": "Task",
      "Resource": "arn:aws:lambda:us-east-1:123456789012:function:saveOrderToDatabaseFunction",
      "Parameters": {
        "OrderId.$": "$.validationOutput.OrderId",
        "customerEmail.$": "$.validationOutput.customerEmail",
        "productId.$": "$.validationOutput.productId",
        "quantity.$": "$.validationOutput.quantity"
      },
      "End": true
    }
  }
}
In this example:
ResultPathstores the output ofValidateOrderin$.validationOutput.Parametersensure that theOrderId,customerEmail,productId, andquantityare passed to theSaveOrderToDatabasefunction from the previous state.
Error:
{ "statusCode": 500, "body": "{\"message\": \"Payment processing failed\", \"error\": \"Missing 'amount' in the event\"}" }

Steps to Diagnose and Fix:
Check the Input to the Payment Lambda Function:
Ensure that the event passed to the Payment Processing Lambda function contains the required
amountfield.You can log the event in the Lambda function to verify the incoming data.
Ensure
amountis Passed Between Steps in Step Functions:- Make sure that the
amountfield is being included in the output of the previous steps and passed correctly to the Process Payment step.
- Make sure that the
Example Lambda Function with Logging:
You can log the entire event in the processPaymentFunction Lambda function to inspect the incoming event and ensure the amount is present:
import json

def lambda_handler(event, context):
    try:
        # Log the entire event to inspect the input
        print(f"Received event: {event}")

        # Extract the required fields from the event
        amount = event.get('amount')
        payment_method = event.get('paymentMethod')
        order_id = event.get('OrderId')

        # Ensure 'amount', 'paymentMethod', and 'OrderId' are present
        if not amount:
            raise Exception("Missing 'amount' in the event")
        if not payment_method:
            raise Exception("Missing 'paymentMethod' in the event")
        if not order_id:
            raise Exception("Missing 'OrderId' in the event")

        # Simulate payment processing (replace this with actual payment gateway logic)
        if payment_method == 'creditCard':
            print(f"Processing payment for order {order_id}, amount: {amount}")
            return {
                'statusCode': 200,
                'body': json.dumps({
                    'status': 'SUCCESS',
                    'orderId': order_id
                })
            }
        else:
            raise Exception('Payment method not supported')

    except Exception as e:
        print(f"Error processing payment: {e}")
        return {
            'statusCode': 500,
            'body': json.dumps({
                'message': 'Payment processing failed',
                'error': str(e)
            })
        }
In this example, the function logs the event received to CloudWatch. If amount is missing, it raises an exception with a clear message.
Step Functions Configuration:
Ensure that the amount field is being passed from the previous step in the Step Functions workflow to the Process Payment step.
If amount is generated or calculated in a previous step, make sure that it is passed as part of the event when transitioning to the Process Payment state.
Here’s an example of how to configure the Process Payment state in Step Functions to include amount:
{
  "ProcessPayment": {
    "Type": "Task",
    "Resource": "arn:aws:lambda:us-east-1:202533534284:function:processPaymentFunction",
    "Parameters": {
      "amount.$": "$.orderDetails.amount",  // Adjust based on where amount is in the event
      "paymentMethod.$": "$.orderDetails.paymentMethod",
      "OrderId.$": "$.orderDetails.OrderId"
    },
    "Next": "UpdateInventory"
  }
}
Key Things to Check:
Check Input and Output in Step Functions: In the AWS Step Functions console, review the execution history to see what input is passed to each state. Verify that the
amountfield is present in the input to the Process Payment state.Log the Input in Lambda: Add the logging in your processPaymentFunction Lambda to check what fields are passed and troubleshoot why
amountis missing.Adjust Step Functions Parameters: If
amountis generated earlier in the workflow, make sure it is passed correctly from the previous state to the Process Payment state.
Example Event:
Here’s what the event should look like when passed to the processPaymentFunction Lambda:
{
  "amount": 100,
  "paymentMethod": "creditCard",
  "OrderId": "1234"
}
Conclusion:
Log the Input: Verify what event is passed to the Process Payment Lambda by logging it in CloudWatch.
Check Step Functions: Ensure that the
amountfield is passed correctly from the previous step to the payment processing step.Adjust Parameters: If necessary, modify the Step Functions state machine definition to ensure that
amountis included in the input to the payment step.
WebApp Test

Access Web App from URL

Verify that order created successful and order receipt generated and saved to the S3 bucket


Verify from the dynamoDb ‘Order’ Table - OrderNumber:2903


Verify from “Inventory” Table that the stock count is reduced

DevOps
To deploy your Order Processing System with a DevOps approach, you need to implement a streamlined CI/CD pipeline to automate the entire deployment process for both your frontend and backend components. I'll guide you through each phase of the DevOps lifecycle to deploy this project step by step, ensuring automation, scalability, and efficiency.
Here's an outline of the phases:
Phase 1: Source Code Management (Version Control)
1.1 Setup a Git Repository
Use Git as the version control system for managing your source code.
If you haven’t done so, initialize a Git repository in your project folder and push the code to a remote Git repository like GitHub, GitLab, or Bitbucket.
git init
git add .
git commit -m "Initial commit for order-processing-system"
git remote add origin https://github.com/your-repo-url.git
git push -u origin main
Phase 2: Continuous Integration (CI)
2.1 Setup CI for Frontend (React App)
Install Dependencies and Build the Frontend:
In your CI pipeline, define steps to install dependencies, run tests (if any), and build the frontend code.
Use a service like GitHub Actions, GitLab CI, or Jenkins to automate this process.
Example for GitHub Actions:
Frontend CI Pipeline

on:
  push:
    branches:
      - main

jobs:
  build:
    runs-on: ubuntu-latest
    steps:
    - uses: actions/checkout@v2
    - name: Install Node.js
      uses: actions/setup-node@v2
      with:
        node-version: '14'
    - run: npm install
    - run: npm run build
    - name: Upload Build Artifacts
      uses: actions/upload-artifact@v2
      with:
        name: build
        path: build/
Unit Testing
To test the OrderForm component using Jest, follow the steps below. Jest is already included in your project as a dependency, so you can directly create the test files.
Step 1: Install any necessary dependencies
Since you're using React, @testing-library/react and @testing-library/jest-dom are typically used for testing React components.
You can install these if they aren't already installed:
npm install --save-dev @testing-library/react @testing-library/jest-dom
Step 2: Create a test file for OrderForm
Inside your src folder, create a __tests__ folder (if not already created) and add a file called OrderForm.test.js:
mkdir -p src/__tests__
touch src/__tests__/OrderForm.test.js
Step 3: Write Unit Tests for OrderForm
Below is an example test for OrderForm. It mocks the fetch API, tests user interactions, and checks that the order is successfully placed.
import React from 'react';
import { render, screen, fireEvent, waitFor } from '@testing-library/react';
import '@testing-library/jest-dom/extend-expect'; // For better assertion syntax
import OrderForm from '../OrderForm'; // Adjust the path if needed

// Mocking the fetch function
global.fetch = jest.fn(() =>
  Promise.resolve({
    ok: true,
    json: () => Promise.resolve({ OrderId: '1234' }),
  })
);

describe('OrderForm Component', () => {
  beforeEach(() => {
    // Reset fetch mock before each test
    fetch.mockClear();
  });

  test('renders OrderForm and displays the title', () => {
    render(<OrderForm />);
    expect(screen.getByText('AWS Serverless Order Management System')).toBeInTheDocument();
  });

  test('submits the form and displays success message with order number', async () => {
    render(<OrderForm />);

    // Enter values into form fields
    fireEvent.change(screen.getByLabelText(/Product ID/i), { target: { value: 'P001' } });
    fireEvent.change(screen.getByLabelText(/Quantity/i), { target: { value: '2' } });
    fireEvent.change(screen.getByLabelText(/Customer Email/i), { target: { value: 'test@example.com' } });

    // Click the submit button
    fireEvent.click(screen.getByText(/Place Order/i));

    // Wait for the fetch to complete and the success message to appear
    await waitFor(() => screen.getByText(/Order placed successfully!/));

    // Assert that success message is displayed
    expect(screen.getByText(/Order placed successfully!/)).toBeInTheDocument();

    // Assert that the order number is displayed
    expect(screen.getByText(/Order Number: 1234/)).toBeInTheDocument();
  });

  test('handles failed order submission', async () => {
    // Mocking fetch to return an error response
    fetch.mockImplementationOnce(() =>
      Promise.resolve({
        ok: false,
        json: () => Promise.resolve({ error: 'Failed to place order' }),
      })
    );

    render(<OrderForm />);

    // Enter values into form fields
    fireEvent.change(screen.getByLabelText(/Product ID/i), { target: { value: 'P001' } });
    fireEvent.change(screen.getByLabelText(/Quantity/i), { target: { value: '2' } });
    fireEvent.change(screen.getByLabelText(/Customer Email/i), { target: { value: 'test@example.com' } });

    // Click the submit button
    fireEvent.click(screen.getByText(/Place Order/i));

    // Wait for the fetch to complete and error message to appear
    await waitFor(() => screen.getByText(/Failed to place order/));

    // Assert that failure message is displayed
    expect(screen.getByText(/Failed to place order/)).toBeInTheDocument();
  });
});
Step 4: Run the Tests
Now, you can run the tests using the following command:
npm test
Breakdown of the Tests:
Test 1: Renders OrderForm Component
- This test ensures that the form renders correctly and the title "AWS Serverless Order Management System" is displayed.
Test 2: Successfully Places an Order
- This test simulates filling out the form, submitting it, and checks that the order is placed successfully by asserting that the success message and order number are displayed.
Test 3: Handles Failed Order Submission
- This test mocks a failed response from the API and checks that an error message is displayed when the form submission fails.
Step 5: Check for Code Coverage (Optional)
You can check for code coverage by running Jest with the --coverage flag:
npm test -- --coverage
This will generate a code coverage report for your tests.

Frontend CI
To add the GitHub Actions workflow to your local project in VSCode and then upload it to GitHub, follow these steps:
Step 1: Create the GitHub Actions Workflow Directory
In your local project directory (in VSCode):
Navigate to the root of your project.
Create a
.githubdirectory inside the root directory:- In VSCode, right-click in the explorer view and select New Folder, then name it
.github.
- In VSCode, right-click in the explorer view and select New Folder, then name it
Inside the
.githubfolder, create a workflows directory:- Right-click again inside
.githuband select New Folder, then name itworkflows.
- Right-click again inside
Your directory structure should look like this:
/your-project
  ├── /src
  ├── /public
  ├── /node_modules
  ├── package.json
  ├── .gitignore
  └── /.github
        └── /workflows
Step 2: Add the GitHub Actions Workflow File
Inside the
/workflowsfolder, create a new YAML file for the CI pipeline. You can name it something meaningful, such asci.ymlorfrontend-ci.yml.Example:
- Right-click on the
/workflowsfolder, select New File, and name itfrontend-ci.yml.
- Right-click on the
Open the
frontend-ci.ymlfile and add the workflow configuration for Jest tests and frontend build that we created earlier.
Frontend CI Pipeline

on:
  push:
    branches:
      - master


jobs:
  deploy:
    runs-on: ubuntu-latest
    permissions:
      id-token: write  # Required to generate OIDC token
      contents: read   # Required to read repo contents
    steps:

       # Step 1: Checkout the repository
      - name: Checkout Code
        uses: actions/checkout@v3

      # Step 2: Configure AWS Credentials
      - name: Configure AWS Credentials
        uses: aws-actions/configure-aws-credentials@v4
        with:
          role-to-assume: arn:aws:iam::202533534284:role/awsGitHubActionsRole1
          aws-region: us-east-1

       # Step 3: Set up Node.js environment
      - name: Install Node.js
        uses: actions/setup-node@v2
        with:
          node-version: '14'

      # Step 4: Install dependencies
      - name: Install dependencies
        run: npm install
        working-directory: ./frontend

      # Step 5: Build the frontend
      - name: Build frontend
        run: npm run build
        working-directory: ./frontend

      # Step 6: Upload build artifacts
      - name: Upload Build Artifacts
        uses: actions/upload-artifact@v3
        with:
          name: build
          path: frontend/build/

      # Step 7: Deploy to S3
      - name: Deploy to S3
        run: aws s3 sync ./frontend/build s3://ordeprocess-frontend/ --delete
Step 3: Commit the Changes and Push to GitHub
Once the GitHub Actions workflow is set up locally, you need to commit and push it to your GitHub repository.
Stage the changes: In VSCode terminal (or your terminal of choice), run:
git add .github/workflows/frontend-ci.ymlCommit the changes:
git commit -m "Add CI pipeline for Jest tests and frontend build"Push the changes to GitHub:
git push origin main
Step 4: Verify the Workflow on GitHub
After pushing the changes:
Go to your GitHub repository.
Navigate to the Actions tab in the repository.
You should see the Frontend CI Pipeline running automatically if a push was made to the
mainbranch.
Summary:
Create a
.github/workflowsdirectory in your local project.Add a
frontend-ci.ymlfile inside that directory with the GitHub Actions configuration.Commit and push the changes to GitHub.
Verify that the pipeline is running from the Actions tab in your GitHub repository.
To store credentials securely for a CI pipeline, you typically use the CI/CD platform’s secret management system. Here's how to securely store your AWS credentials on some common CI platforms:
Configure Secrets
In GitHub Actions, secrets can be stored in GitHub Secrets. Here's how to do it:
Go to your GitHub repository.
Navigate to
Settings>Secrets and variables>Actions.Click on the "New repository secret" button.
Add your AWS credentials as secrets:
Name:
AWS_ACCESS_KEY_IDValue: Your AWS access key.
Add another secret for the secret key:
Name:
AWS_SECRET_ACCESS_KEYValue: Your AWS secret access key.
Now, in your GitHub Actions workflow file (.github/workflows/<your-workflow>.yml), reference the stored secrets like this:
env:
  AWS_ACCESS_KEY_ID: ${{ secrets.AWS_ACCESS_KEY_ID }}
  AWS_SECRET_ACCESS_KEY: ${{ secrets.AWS_SECRET_ACCESS_KEY }}
Error:
Error: Credentials could not be loaded, please check your action inputs: Could not load credentials from any providers
Error: This request has been automatically failed because it uses a deprecated version of actions/upload-artifact: v2. Learn more: https://github.blog/changelog/2024-02-13-deprecation-notice-v1-and-v2-of-the-artifact-actions/

Fix:
GitHub has deprecated versions v1 and v2 of the upload-artifact action. You need to update it to use v3
Solution: Update upload-artifact to version v3
# Step 6: Upload build artifacts (Updated to v3)
      - name: Upload Build Artifacts
        uses: actions/upload-artifact@v3
        with:
          name: build
          path: build/
Error:
Error: Credentials could not be loaded, please check your action inputs: Could not load credentials from any providers

Fix: Solution
To integrate GitHub Actions with AWS using OpenID Connect (OIDC), you need to manually add GitHub as an OIDC provider. This involves creating a custom OIDC identity provider for GitHub in your AWS IAM settings.
Here’s how to set it up:
1. Create GitHub as an OIDC Provider:
Go to the IAM console in the AWS Management Console.
In the left sidebar, click “Identity providers.”
Click on “Add provider.”
In the Provider type, select “OpenID Connect (OIDC)”.
In the Provider URL, enter:
https://token.actions.githubusercontent.comFor Audience, enter:
sts.amazonaws.comClick “Add provider” to create the provider.


2. Create or Update an IAM Role:
After adding GitHub as an OIDC provider, navigate to “Roles” in the IAM console.
Click “Create role”.
Select “Web identity” as the trusted entity type.
In the Identity provider dropdown, select the GitHub OIDC provider you created (
https://token.actions.githubusercontent.com).For Audience, select
sts.amazonaws.com.Under "Conditions," add the following condition:
{ "StringEquals": { "token.actions.githubusercontent.com:sub": "repo:<GitHub-Org-or-User>/<Repo-Name>:ref:refs/heads/<Branch-Name>" } }- Replace
<GitHub-Org-or-User>,<Repo-Name>, and<Branch-Name>with your GitHub organization/user, repository name, and branch name.
- Replace
Assign permissions like AmazonS3FullAccess or other required policies to allow access to the necessary AWS resources.
Complete the role creation.
3. Update Your GitHub Actions Workflow:
Once the OIDC provider and role are set up, update your GitHub Actions workflow to assume the IAM role:
jobs:
  deploy:
    runs-on: ubuntu-latest
    permissions:
      id-token: write  # Required for OIDC
      contents: read

    steps:
      - name: Checkout Code
        uses: actions/checkout@v3

      - name: Configure AWS Credentials
        uses: aws-actions/configure-aws-credentials@v4
        with:
          role-to-assume: arn:aws:iam::<ACCOUNT_ID>:role/<Role-Name>
          aws-region: us-east-1

      - name: Deploy to S3
        run: aws s3 sync ./frontend/build s3://<bucket-name>/ --delete
Key Points:
OIDC provider URL should be
https://token.actions.githubusercontent.com.Audience should always be set to
sts.amazonaws.com.The IAM role should allow the
sts:AssumeRoleWithWebIdentityaction.Ensure that the trust relationship policy specifies the GitHub repository and branch to limit access.
2. Create or Update an IAM Role:
After adding GitHub as an OIDC provider, navigate to “Roles” in the IAM console.
Click “Create role”.
Select “Web identity” as the trusted entity type.
In the Identity provider dropdown, select the GitHub OIDC provider you created (
https://token.actions.githubusercontent.com).For Audience, select
sts.amazonaws.com.Under "Conditions," add the following condition:
{ "StringEquals": { "token.actions.githubusercontent.com:sub": "repo:<GitHub-Org-or-User>/<Repo-Name>:ref:refs/heads/<Branch-Name>" } }- Replace
<GitHub-Org-or-User>,<Repo-Name>, and<Branch-Name>with your GitHub organization/user, repository name, and branch name.
- Replace
Assign permissions like AmazonS3FullAccess or other required policies to allow access to the necessary AWS resources.
Complete the role creation.


3. Update Your GitHub Actions Workflow:
Once the OIDC provider and role are set up, update your GitHub Actions workflow to assume the IAM role:
jobs:
  deploy:
    runs-on: ubuntu-latest
    permissions:
      id-token: write  # Required for OIDC
      contents: read

    steps:
      - name: Checkout Code
        uses: actions/checkout@v3

      - name: Configure AWS Credentials
        uses: aws-actions/configure-aws-credentials@v4
        with:
          role-to-assume: arn:aws:iam::<ACCOUNT_ID>:role/<Role-Name>
          aws-region: us-east-1

      - name: Deploy to S3
        run: aws s3 sync ./frontend/build s3://<bucket-name>/ --delete
Key Points:
OIDC provider URL should be
https://token.actions.githubusercontent.com.Audience should always be set to
sts.amazonaws.com.The IAM role should allow the
sts:AssumeRoleWithWebIdentityaction.Ensure that the trust relationship policy specifies the GitHub repository and branch to limit access.
Test the GitHub Actions:


Web app


